Labels

Bread (7) Buns (1) Cheese (1) Christmas (7) Comfort (8) Cookies (7) Crock Pot (1) Dessert (13) Easy (13) Entrees (4) Fast (9) Fruit (7) Healthy (3) Italian (4) Muffins (4) Not-so-healthy (8) Pastry (2) Pub food (1) Pumpkin (2) Savoury (1) Scones (2) Slow Cooker (1) Soup (3)

Tuesday, May 26, 2015

Spicy Coconut Curry Carrot Soup


I looked at a few carrot soup recipes before deciding to base it on a ginger-curry soup and make up the amounts myself. I'm happy to say that it turned out really well!  I think this is quite forgiving and easy to customize based on individual tastes.

I found it too sweet at first, because of the wonderful sweetness of carrots from the garden, so I added quite a bit of salt and threw in this magical red curry paste. This is what we use for our Thai curry stir-fry and it has been a favourite in our pantry for a while now. It comes in small expensive jars (or in a larger bag of paste from Superstore for something like a quarter of the price).


Sliced yellow onion
Diced garlic (4-6 cloves)
1 Tbsp coconut oil
Carrots (lots. Cut into rounds)
Approx 2/3 carton of chicken stock
2 tsp yellow curry
Sprig of rosemary
Sprig of thyme
1/2 tsp ground ginger
Salt and pepper to taste
Squirt of spicy red curry paste , to taste (be careful! It seems to get spicier as it cooks!)
1/2 cup coconut milk
Garnish with cilantro or basil

Start by sauteing the onions and garlic in the coconut oil, and place in the slow cooker with the carrots and chicken stock. Add the spices (except for the red curry paste) and let it cook down until everything is soft (likely a couple of hours on high). Take out the sprig herbs and use an immersion blender to puree the carrots, onions and garlic. Add the red curry paste a bit at a time, as well as the coconut milk.

Garnish with some cilantro, and serve with cheese biscuits (I use my super easy biscuit recipe and just add in some grated strong cheddar).

Enjoy!

Thursday, January 15, 2015

Peanut Butter Marshmallow Squares

Have you ever made a shameful treat like this one and then proceeded to "forget" to serve them to your guests and then eaten the entire pan yourself over the course of 3 days?

Me neither.


However, to defend myself, the marshmallows are fruit-flavoured (who knew?) and peanut butter is full of protein.  And the recipe couldn't be easier. The marshmallow package and likely the butterscotch chips package will both have a version of this treat listed there. This is my easy version.

50g (just over 4 cups) marshmallows (1 bag! How easy!)
300g butterscotch chips (nearly 2 cups) (1 bag! How easy!)
1/2 cup margarine (1 prepackaged square! Easy!)
3/4 cup peanut butter

Melt the chips, margarine, and peanut butter over medium heat. You're supposed to use a double boiler but if you're careful to stir constantly you can heat it directly in a saucepan (the goal is not to burn anything on the bottom).

Let the mixture cool so that it still flows but will not melt the marshmallows. Mix in the 'mallows and let set in a greased 9" x 9" pan. Refrigerate until set.

Friday, June 20, 2014

French Fries


Russets. With the peel. Baked. Best fries we have ever had. Thanks, Annie's Eats!

  • Cut potatoes into fries, soak in very hot water for up to half an hour.
  • Dry them off and dry out the bowl. 
  • Toss with a bit of olive oil and lots of salt and pepper.
  • Spread into a baking sheet that has itself been coated with oil (use a pastry brush) and seasoned well with salt and paper. 
  • Bake on high (475 degrees F) for about 20 minutes, flip each fry over, bake for another 10-15 minutes depending on how crispy you like them. We like them well done as above so they are all crispy and crunchy.
  • Dab oil off with paper towel if desired, and enjoy.


Wednesday, May 21, 2014

Carrot Cake


My husband gets most of his vegetables from carrot cake. I'm just kidding. But seriously. The Pioneer Woman makes a great recipe - so great that all I changed was that I took out the nuts in the icing. I also find that this makes a little too much cake for one 9 x 13 pan - it rises high and takes too long to cook in the middle. Next time I will halve the recipe in total (batter and icing) and it'll make a shallower cake with a higher icing-to-cake ratio.


For the cake, mix together:

  • 4 eggs
  • 2 cups sugar
  • 1 cup vegetable oil

Separately, combine:

  • 2 cups flour
  • 1/2 tsp salt
  • 1 tsp each of baking soda, baking powder, and cinnamon

Add the flour mixture to the cake and then add 2 cups of grated carrots. Combine and pour into a greased sheet cake pan or Pyrex. Bake at 350 degrees for anywhere from 30-50 minutes (depending on if you used the full recipe and had it in one pan or in two). Mine took even more than 50 minutes to fully cook in the centre. Use the clean toothpick test to confirm it is done.

When it has cooled, spread with this icing:
  • 1 stick (1/2 cup) softened butter
  • 1 package (8 oz) softened cream cheese
  • 1 pound (4 cups) icing sugar
  • 2 tsp vanilla

Wednesday, May 07, 2014

Pumpkin Cheesecake


I have never found a cheesecake in my life before that I liked (some people say that's weird) - and at age 28, I found this one, from One Perfect Bite. I actually ate an entire piece of this to myself, which is a big step for a cheesecake-hater.

I cheated for this one and used a pre-made crust because I saw it for $2 across the line (so cheap!). I also halved the recipe into the portions below because I wasn't sure how it would turn out, and I didn't want to waste 4 packages of cream cheese... and it was the perfect amount. My husband and 2 friends and I devoured it in one evening.

For the cake:

  • 1/8 cup melted butter
  • 2 packages (8 ounces each) softened cream cheese
  • 3/4 cups sugar
  • 1 Tbsp cornstarch
  • 1 tsp vanilla extract
  • 2 eggs
  • 1/2 cup canned pumpkin
  • 1 tsp cinnamon
  • 3/4 tsp nutmeg

Beat ingredients in order. Once the eggs are added, beat on low until just combined. Take a cup of the mixture and put it aside in a small bowl. Stir the pumpkin, cinnamon and nutmeg into this smaller amount. Then separate 1/2 cup of this new mixture (spiced pumpkin cream cheese) into another bowl.

Pour the majority of the pumpkin filling over the crust, then top with the plain cream cheese batter. Swirl a knife through this mixture, then drop the remaining pumpkin on top and cut this in as well. 

Bake at 350 degrees for 50-65 minutes, until top of cake is just set and loses its glossiness. Place a baking sheet of water underneath to provide steam that will help to prevent cracks in the surface (I still have not mastered this, clearly). 

Serve after chilling overnight (or a couple hours in the freezer). 

Tuesday, March 25, 2014

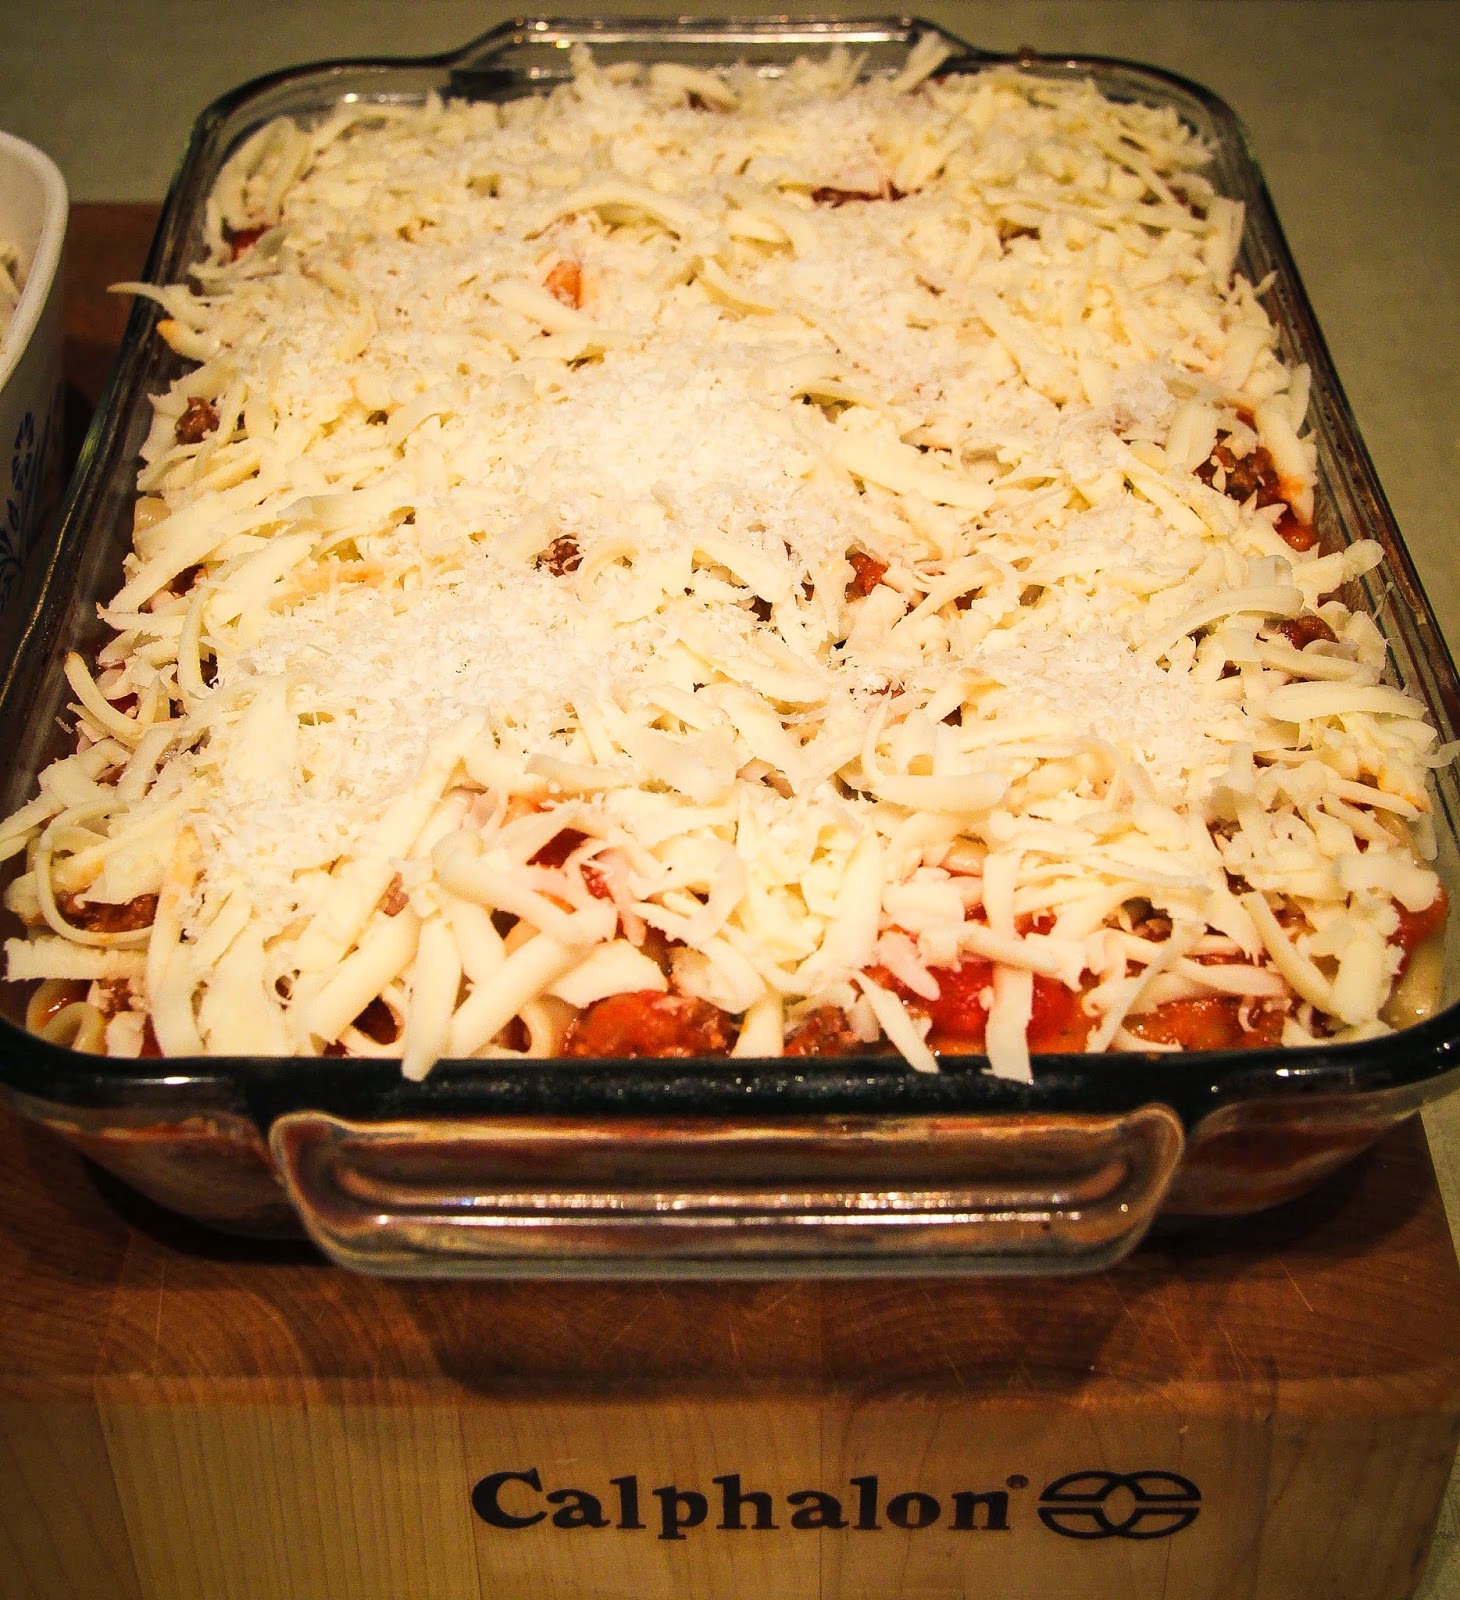
Lasagna

This may be "Canadianized" lasagna, but it is my favourite type because it's what I grew up with. I was always happy when Mom made this for dinner.


To make 1 large and 1 mini-lasagna:

Sautee:
  • 1 Tbsp olive oil
  • 1 chopped yellow onion, on the larger side
  • Several garlic cloves or 1-2 tsp garlic powder
  • Approx 2 lb ground beef (this could be even less, compensating by making it saucier - it's all based on preference)
Sautee the onion and garlic in the olive oil, then add ground beef and cook until browned.  Add water if needed, but be sure to pour off any fat/grease before adding sauce.

Add:
  • 1 Tbsp parsley if you have it, or I used a mix of basil and oregano
  • Salt to taste
  • 1/4 tsp pepper
  • 1 1/2 cans of pasta sauce (I used a pre-spiced "garlic and herb" sauce, 28-oz size can)
Let the sauce and meat simmer for 5 minutes. Separately, blend:
  • Approx 2 cupes cottage cheese
  • 2 beaten eggs
Also prepare:
  • 1/2 lb lasagne noodles, cooked and drained (half a package)
  • 1/2 lb sliced mozarella cheese - or as desired
  • 1/4 cup grated parmesan cheese
Now you are ready to assemble the lasagna(2).  Layer in this order, spreading through the two pans:
  • thin layer of meat sauce
  • half of the noodles
  • all the cottage cheese mixture
  • half of the mozzarella
  • half of the remaining meat sauce
  • remaining noodles
  • remaining meat sauce
  • remaining mozzarella
  • grated Parmesan cheese


Bake at 350 degrees for 30-45 minutes.  I prefer my cheese topping browned and crusty so I end up leaving it in closer to the 45 minutes.

Enjoy!

Sunday, January 12, 2014

Pumpkin Cookies


I tasted some great, soft pumpkin cookies at Halloween and have had a hankering for them ever since. I grabbed the first recipe I found from Better Homes and Gardens and did not change much, although I used my favourite icing recipe from my favourite sugar cookies.  Start by preheating the oven to 350 degrees.
Beat:
  • 2 cups butter, softened
Mix in:
  • 2 cups granulated sugar
  • 2 teaspoons baking powder
  • 2 teaspoons baking soda
  • 1 teaspoon salt
  • 1 teaspoon ground cinnamon
  • 1 teaspoon ground nutmeg
  • 2 eggs
  • 2 teaspoons vanilla
  • 1 15-ounce can pumpkin
Add:
  • 4 cups all-purpose flour (plus up to 1 more cup as needed - I found I over-melted my butter and needed to add a bit of flour... they still turned out yummy!). If you need to finish adding flour with a spoon, whatever it takes.
Drop onto cookie sheets - if you want to make them perfectly round go ahead, that's too much work for me and I left mine a bit too sticky to do that anyway. Bake for 10-15 minutes - I made mine quite large, yielding about 50 instead of 60 so I needed to give them about 15 minutes. They should be still soft when they come out so that the surface hardens as they cool.

Frost as desired using the links above (my easy icing is 1 cup icing sugar, 2 tsp milk and 2 tsp light corn syrup).

Monday, June 24, 2013

Mac 'n' Cheese


A co-worker of mine gave me her mac and cheese recipe - hers has been the only homemade version that I have ever liked in my life. My rendition turned out pretty close to hers so I consider it a success.

Start by cooking your macaroni - I used half of a 900g package (only part of which is pictured below).  Salt it well. Shred a variety of cheese - probably about 2 cups (I used regular and sharp cheddars, while my co-worker used pepper jack and cheddar).  

In a 4-cup measuring cup, melt 1/4 cup butter or margarine and add 3-4 tsp of flour to make a thick slurry.  Add 1 1/4 cup of milk, and either cube 1 1/2 cups of Velveeta or add about 1 1.2 cups of cheese whiz. Melt the mixture in the microwave and stir every minute or so.  Add more cheese whiz or flour if it's too thin, or milk if it's too thick.  It should be just thin enough to pour onto the macaroni. 

Grease the casserole dish very well (Pam or margarine or whatever you prefer) and add half of the macaroni. Sprinkle half of the cheese on top, then layer with the next half of cooked macaroni. Pour the cheese whiz mixture over the entire dish evenly, then sprinkle the remaining cheese on top. Add salt and pepper and paprika for colour. 


Bake at 425 degrees for about 25 minutes - until the cheese on top is thickly crusted and nearly burnt.  Serve with more carbs if desired (I can't resist carbs so I paired it with cornbread).  Enjoy! 


Thursday, June 20, 2013

Cinnamon Snails


A friend gave me this recipe back when we were in high school and didn't really use the world wide web for much. I have no idea where it came from but had a craving the other day and asked my mother to search her house for it. It is quick and easy and they are tasty!

Dough:
  • 1.5 cups flour 
  • 1/4 cup sugar
  • 2 3/4 tsp baking powder
  • Dash of salt (approx 1/2 tsp)
  • 3/8 cup margarine
  • 1/2 cup milk with 1 egg beaten into it (only use about half in the dough)
Filling:
  • 3 Tbsp brown sugar
  • 1 tsp cinnamon

Mix the dry ingredients together. I melted the margarine and mixed it in, then added just enough of the milk/egg mixture to allow the dough to pull together into a mass that was able to be rolled with a rolling pin.  I used just under 1/2 of the mixture, and I ended up with some leftover milk/egg at the end of the recipe so you may wish to just mix the egg with 1/3 or 1/4 cup milk.

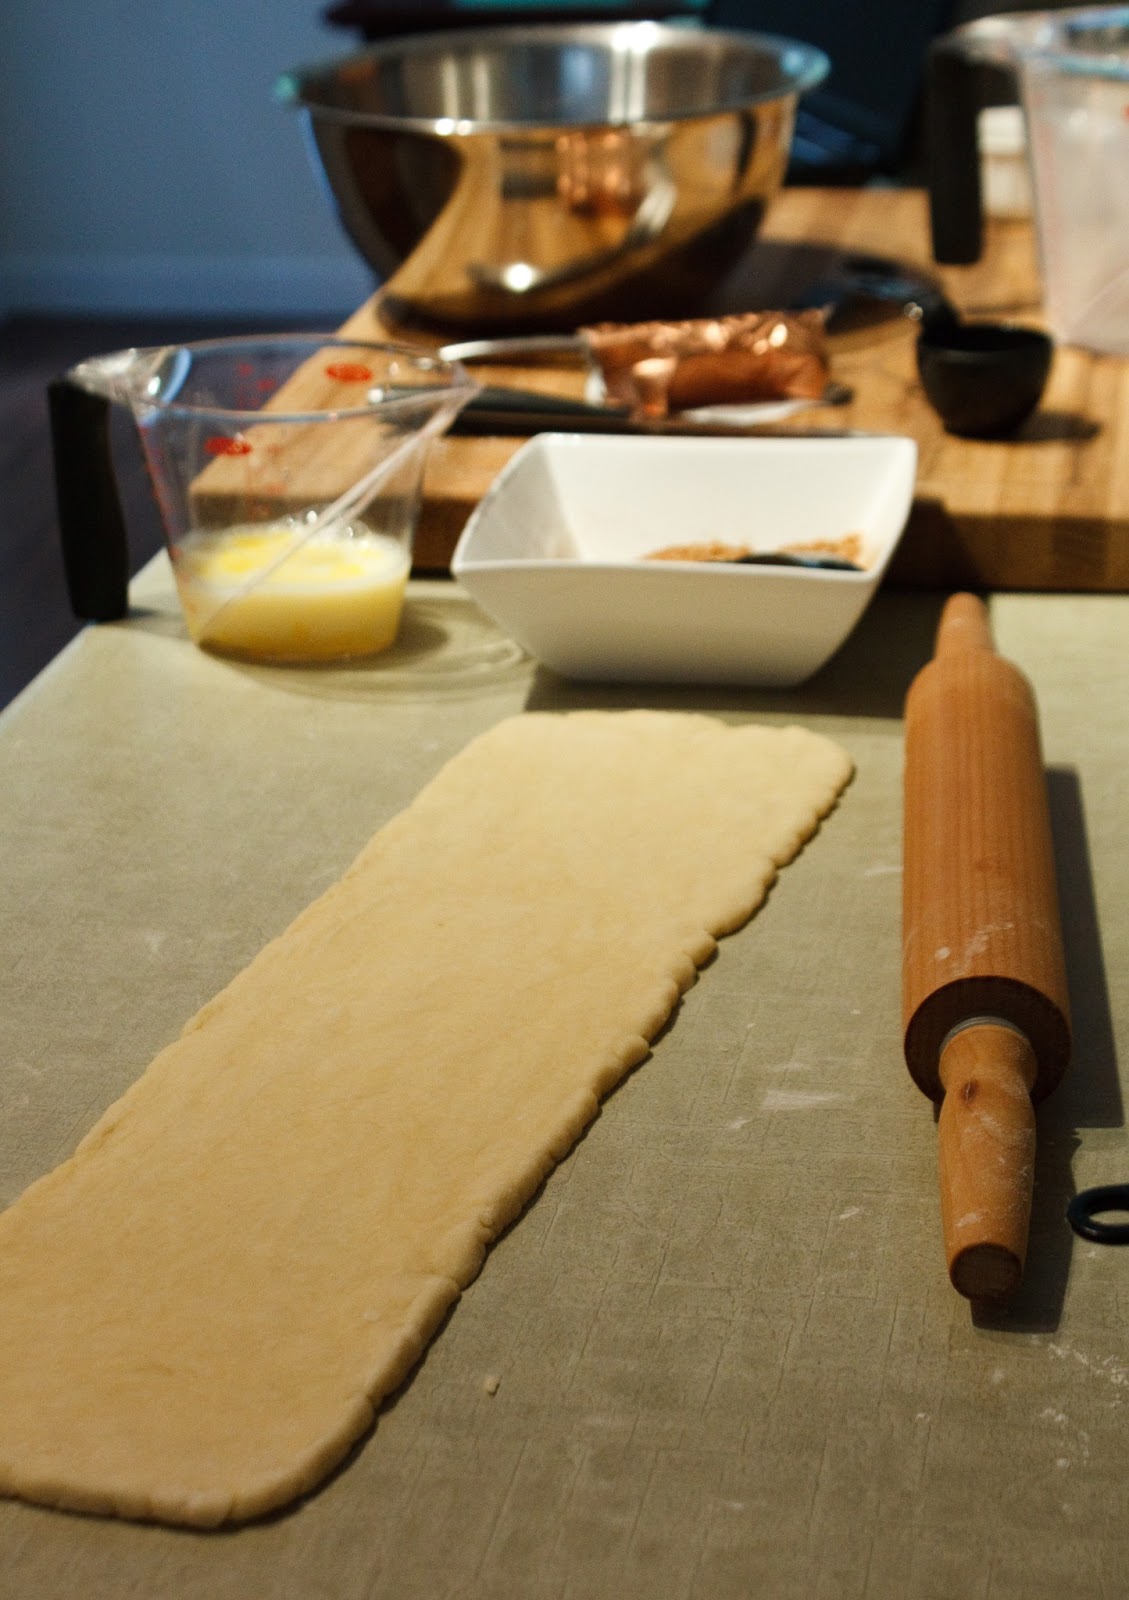
Roll the dough into a long rectangle, at least three times as long as it is wide.  I made mine about 18" x 6", and the swirls seemed too small at first but they puffed up while baking.


Spread some of the milk and egg mixture onto the dough and sprinkle liberally and evenly with the topping. Roll into a tight, long log (roll starting from the long side). Cut with a very sharp knife in approximately 3/4" widths. I found that my dough crumbled if I used the dough scraper or even dental floss - I used a filet knife to get a sharp cut. Bake at 350 degrees on parchment paper for about 14 minutes until they have risen and browned - they will harden a bit further after they are removed from the oven and they should be crumbly when eaten.

Enjoy!

Thursday, May 30, 2013

Three-Cheese Tomato Orzo Soup


Aside from the cheese, I consider this soup to be a healthy meal option. It's quite quick and easy to make (half hour if everything is available), and is a huge hit at my house.

Start with:

  • 1 diced yellow onion
  • 2-3 cloves minced garlic
  • 1 Tbsp olive oil
Heat the olive oil in a soup pot and brown the onions over medium heat - just a few minutes until they're tender and translucent.  Add the garlic and brown for another minute or two. 

Add (feel free to be flexible with amounts - this is just a guideline):
  • 2 (28 oz) cans of whole or diced tomatoes - I use whole and cut them up a bit. They seem a bit more flavourful than the diced ones. Add the liquid from the can also.
  • 2 cups chicken or vegetable broth
  • 1 cup plain Greek yogurt
  • 1/2 cup fresh basil if available, or a couple of teaspoons of dried basil
  • 2 tsp oregano
  • 1-2 tsp sugar, to taste (if I use more yogurt because it needs to be used up, another tsp of sugar or so is helpful)
  • Salt and pepper to taste
Simmer until well-heated throughout, then blend with an immersion/stick blender. Add cheese as desired - I used a sharp vintage white cheddar (love Tillamook cheese!), a bit of parmesan and some Friulano cheese, a staple of my Italian grandmother-in-law's kitchen.  Probably about 1.5 cups of grated cheese. Add pre-cooked orzo pasta to add some weight to the soup if desired - I love this.  Serve with basic buttered biscuits and enjoy! 


Saturday, April 06, 2013

Cheeze-its


Yum.  As claimed by the original poster, ShopGirlMaria, these do taste like the ones from the box, but you have the added bonus of knowing exactly what ingredients are involved.  I must re-post to ensure this recipe never disappears from my life.  The downside is that two pans of crackers does not last very long in my household.  We could eat salty cheesy snacks for hours.

Mix:
  • 1/4 cup butter or margarine, softened
  • 1/2 tsp salt
  • Approximately 1 cup of shredded sharp cheddar (I use a Tillamook Vintage Cheddar that is heavenly)

Add while mixing:
  • 1 cup flour
  • 3-4 Tbsp ice water (I used 4 and it was the right amount)

Pull the dough together, divide into two and chill for 30 minutes in the fridge in plastic wrap.  Then roll out on a floured surface to about 1/8" thick. Cut into squares with a fluted pastry cutter if you have one (I don't) and if you're not lazy, use a toothpick to prick each one. Spread on parchment paper, sprinkle with about another tsp of salt, and bake at 375 F for about 10 minutes.  They should be puffed and crisp. I found that it worked best to start them on parchment paper so they didn't stick to the pan, but then remove them for the last few minutes so they were more crispy than chewy.

Banana Muffins


These are handed down from my mom, and I have no idea what book she may have originally grabbed these from.  The trick to moist, yummy banana muffins is really old bananas.  I let mine get so brown that you can't see a single bit of yellow left on them, and then I freeze them if I'm not going to use them right away.  It's easy to pull them out of the freezer and let them sit in the sink to thaw for anytime-banana-muffins.

Mix together:

  • 3 overripe bananas
  • 3/4 cup white sugar
  • 1 egg
  • 1/3 cup veg. oil (ie. canola)
Separately, combine:
  • 1 1/2 cups flour
  • 1 tsp baking soda
  • 1 tsp baking powder
  • 1/2 tsp salt
  • chocolate chips as desired (I usually add a big handful, 1/2 cup or so)
Crumble topping (this is heavenly but I am usually too lazy):
  • 1/3 cup packed brown sugar
  • 2 Tbsp flour
  • 1/8 tsp cinnamon
  • 1 Tbsp butter (tip: freeze the butter and then you can grate it so it's easier to mix in)
Combine wet and dry ingredients and mix with a spatula until just moistened.  Spoon into a greased muffin tin.  Sprinkle the topping on each muffin and bake at 375 degrees F for 18-20 minutes, or until a toothpick comes out clean (if doing mini-muffins, I find about 15 minutes is enough).  Enjoy!

Sunday, March 17, 2013

Whole Wheat Buns


I have searched high and low for a light, fluffy, whole wheat-ish bun recipe. My previous attempts had always failed, giving me dense or small buns that tasted good but were a bit of a chore to eat.

No longer.

I found a recipe for light wheat rolls and it has worked for me on several occasions. This may be due to the high yeast content, but the reason really doesn't concern me. These are light and fluffy, and I can make large hamburger-sized buns or divide them into 32 small dinner rolls with a single batch.

Mix yeast into water and let stand for about 10 minutes:

  • 1 3/4 cup warm (yeast-friendly temperature) water 
  • 2 packages active dry yeast (1 package is about 2 1/4 tsp)
Mix separately:

  • 1/2 cup sugar
  • 1 tsp salt
  • 2 1/4 cups whole wheat flour
  • 1/4 cup melted butter or margarine
  • 1 beaten egg

Mix yeast and water into flour mixture and then add 2 1/2 cups all-purpose flour, 1/2 cup at a time.  Stir until dough pulls away from the sides of the bowl (I love my KitchenAid mixer for this).  Add more flour if necessary.  Then knead either in stand mixer or on well-floured surface until smooth and elastic - about 8 minutes. The dough should be sticky but not so much that it gets all over your hands - it should hold mostly together. 


Oil the bowl, turn the dough to coat, then cover with plastic wrap and let rise in a warm place until doubled.  At that point, punch it down and let it rise again.  If my kitchen is warm the first rise takes about 45 minutes and the second one only half an hour or so.

Turn out onto floured surface again, divide into about 16 large buns or 32 small ones (anything that's a multiple of 8 is easy to divide).  Roll into balls and place on a greased cookie sheet.  I choose to cover them with greased/oiled plastic wrap and let rise again in a warm place until buns have doubled in size.  They will look large and puffy and round.  I don't usually butter the tops of the buns but if you like the glossy look feel free to do that. Preheat the oven to 400 degrees. 

Bake for 11-15 minutes depending on the size.  Be careful not to have them too close to the top or bottom elements - I find the tops brown very quickly if I don't put them on the centre rack.  They should be golden brown when finished, and when you turn them over they should sound hollow when tapped on the bottom. Let them cool on a rack and enjoy!

Wednesday, February 20, 2013

Chocolate Chip Oatmeal Cookies


This has been my favourite cookie recipe since I was about six years old. These cookies are chewy and soft and yummy and almost healthy because of the oats. You can read my roommate's description of them here at Breakfast Monkey... just in case you don't believe me that they're yummy.  She totally did beg me to make these multiple times a month, whenever we were supposed to be studying.

Beat together:

  • 2 eggs
  • 1 cup margarine
  • 1 cup sugar (or slightly less, I tend to only fill my cup about 3/4 full)
  • 1 tsp vanilla

Add and mix well:

  • 2 cups flour
  • 1 tsp salt
  • 1 tsp baking soda

Add and hand-mix:

  • 2 cups rolled oats
  • 1-1.5 cups chocolate chips (I usually use 1 cup chocolate, half cup butterscotch or Reese's or white chocolate chips!)

Bake on an ungreased cookie sheet at 350 degrees for 10-12 minutes.  Do not let the cookies get brown!  They should come out soft and they will harden when they cool.  This gives them the chewy, melt-in-your mouth texture that is so desirable. 

Tuesday, February 12, 2013

Peanut Butter Cookies


These were always a favourite growing up. With milk. Or frozen as dough and scooped out piece-by-piece.  The baked cookies just melt in your mouth.

Cream together:

  • 1 cup margarine
  • 1 cup white sugar
  • 2 eggs
Add: 
  • 2 1/4 cups flour (don't underfill, or you'll end up with very sticky dough)
  • 1.5 tsp baking soda
  • 1 tsp salt
  • 1 cup peanut butter
Squish with a fork both ways to get the signature look. Bake at 350 degrees for about 12 minutes.  Try not to break them when removing them from the pan... but don't beat yourself up about it... it's all the same in the stomach.


Saturday, February 09, 2013

Pitas

Taken directly from Annie's Eats.  She has a whole-wheat version too, if I remember right, but so far I can't fathom making anything other than these.

These pitas are so easy if you're bumming around the house and can attend the dough occasionally.  Just like Annie said herself - you won't be able to eat store-bought pitas anymore.  Today my husband asked me to make them as a base for pizzas... and then we just ate them plain with Greek salad instead.


  • 3 cups flour, and a little more as needed
  • 1.5 tsp salt
  • 1 package instant yeast
  • 1 Tbsp sugar or honey in 1 cup warm water (not too hot!)

Mix the salt and flour together, and add the yeast to the cup of sweet water. Let it foam for 10 minutes if you're not sure if your yeast is still kicking, then add it to the flour mixture.  Mix together and knead for about 10 minutes (this is where I thank the Lord for the KitchenAid stand mixer).  Add a little flour if needed to get rid of the major sticky factor.  The dough should pull away from the sides and be tacky but you should be able to handle it decently without it getting all over your hands. 

Cover with plastic wrap and let the dough rise until doubled - probably about 1.5 hours.    

Divide risen dough into 8 portions, shape into balls and let them rest for 20 minutes or so - this will allow them to be pliable. 

Use a rolling pin on a floured surface to shape each ball into a disc, about half an inch thick.  They should be about the diameter of your finished pita.  Place them onto parchment paper or something else non-stick and let them rise, no cover needed, about half an hour.  In the meantime, preheat the oven to 450 degrees with a pizza stone inside. 

Once heated, place as many as you can fit (I usually get 4) into the oven for about 3 minutes. They will puff up and should be cooked through - but I usually flip them over for another minute or so just to get markings on both sides. They will still be good, I promise. If you want a very defined pocket inside, don't flip it over.

Enjoy fresh out of the oven with tzatziki sauce.  You will not regret it. 


Thursday, February 07, 2013

Gnocchi


I married an Italian... with many relatives that live nearby... and for that I am eternally thankful. Gnocchi are small light bites of pillowy goodness - potato dumplings loaded with cheese and spicy meat sauce. We bought the packaged ones from the store once, but they are nothing like Grandma's.  She, in her unique grumpy-grandma style, refused to teach us how to make it like she learned in Italy.  So, we decided to try it on our own and give her a run for her money. 

This is one of those "by feel" recipes that I normally avoid, but after several successful productions (with rave reviews from even the Italians) I am happy to say that we can add this to our cookbook. 
  • 3 large russet potatoes, boiled and peeled
  • 1 egg
  • a generous pinch of salt
  • flour as needed (probably up to 2 cups)

The most important step of the recipe is this: you must put the potatoes through a potato ricer.  When they're cool enough to handle and peel, take portions of the hot potatoes and squish them through.  This will make the finished gnocchi light and fluffy. 

Add the salt, egg, and mix briefly together. Add most of the flour and mix, again briefly.  Do not mix this dough for long - it should come together but not be completely homogeneous.  Add flour until the dough (still warm!) is pliable and doesn't completely stick to your hands. Essentially it has to be enough like a pasta dough that you can roll it out into long snakes. You want to add the minimum amount of flour necessary, as the finished product will be more dense if there is more flour in it. 


Cut the snakes into small pieces and squish halfway with a fork (I find the dough should be sticky enough that it would cling to the fork in an annoying way... so flour the fork to keep this from driving you crazy).  This creates grooves for the pasta sauce and cheese to cling to. Grandma is very good at quickly whipping them off the fork... we will need a lot more practice at this.


Prep a pot of boiling water, well salted, with a bit of oil to keep them from sticking. Cook them like pierogies - drop several into the water, remove right away once they float to the top (this will be 10-30 seconds or so).  Taste to confirm that the dumpling is light and cooked fully through.

Load with cheese - parmesan, friulano, romano - anything white and sharp and tasty.  Add your favourite sauce - we usually take something that's good from a jar or can and add sauteed onions, peppers, and pieces of Italian sausage from a local butcher.

Enjoy with a salad and ciabatta bread.

Friday, December 28, 2012

Whipped Shortbread

I first experienced whipped shortbread at a snack table at a funeral.  I nearly asked everyone I saw whether or not they had tried this little piece of heaven... and then I remembered that I'm an adult and I need to restrain myself until a more appropriate time.

A time like Christmas.


Makes about 60 small bite-sized cookies (recipe is easy to halve, double, or increase by 50%):

  • 3 cups flour
  • 1/2 cup cornstarch
  • 1 cup icing sugar
  • 1 lb butter (approx 450 grams or 1 cup - half a "pack" here in Canada)
Whip the butter in a stand mixer.  Trust me, you will want a stand mixer or your arm might fall off.

Add the rest.  Leave it whipping in the mixer for anywhere from 5 to 10 minutes, literally.  This needs to fill with air. The dough will look very fluffy and white, somewhat like frosting or like meringue peaks. 


It's as easy as scooping with a fork onto a pan and baking at 350 degrees for up to 20 minutes.  My oven cooks hot - check after 12 minutes or so and ensure the bottoms aren't browning. These need to cook through but over baking will dry them out.

Sometimes I even cook a half recipe (my husband doesn't like shortbread) and that makes 30 small cookies. 

Enjoy with milk!

Sugar Cookies with Icing


These Wilton cookies paired with this yummy icing are just to die for. My co-worker makes these cookies occasionally and she has them down to a science.  Once you start eating them you will seriously not be able to stop.
  • 1 cup softened unsalted butter
  • 1 1/2 cups sugar
  • 1 egg
  • 1 1/2 tsp vanilla extract
  • 1/2 tsp almond extract (be careful and don't accidentally overpour like I did... or that batch will have a very strong almond flavour!)
Beat the above ingredients until fluffy. Mix the next few ingredients in a bowl and add them to the wet ingredients 1 cup at a time.  Beat with a mixer and use a spatula when necessary to incorporate everything:
  • 2 3/4 cups flour
  • 1 tsp baking powder
  • 1 tsp salt
Roll a portion of dough out on a floured surface (I found about 1/4 inch to be the right width) as the cookies will rise a little bit but not a ton. Use cookie cutters - flour them if you find your dough too sticky. 


Carefully lift them onto a baking sheet and bake at 350 degrees for only about 8 minutes. If the edges start looking brown that's more than enough time!  They should be a nice light yellow without brown spots and they will become a yummy chewy cookie.


Top with icing:
  • 1 cup icing sugar
  • 2 tsp milk
Mix above together, then add 2 tsp of light corn syrup and mix thoroughly.  Spread plain onto the cookies or use fancy icing skills that I don't have.  This part of the cookie-making is very time-consuming for me and my patience levels do not a beautiful cookie make.  Mine make it to my mouth before anyone sees them anyway.

Wednesday, December 19, 2012

Eggnog-Raspberry Muffins


These muffins are taken from inspiredbycharm.com and are a nice light, sweet muffin. I really like that the eggnog does not overpower the muffin. I didn't have cranberries so I picked the next most tart berry I had in my freezer - raspberries.  The original recipe is posted with beautiful pictures so please go there and admire Michael's skills.


Dry ingredients:
  • 2 cups flour
  • 3/4 cups sugar
  • 1 tsp baking powder
  • 1/2 tsp nutmeg
  • 1/2 tsp baking soda
  • 1/2 tsp salt

Wet ingredients:
  • 1 egg
  • 3/4 cup eggnog
  • 1/4 cup vegetable oil
  • 1 teaspoon vanilla
  • 1 cup fresh (or frozen if you're like me and that's all you have) berries

Mix wet ingredients briefly into the dry ones and spoon into a muffin tin (lined or greased). I prefer to make 10 larger muffins and they rise quite well.  Bake at 350 degrees for about 20 minutes (toothpick test).  I baked my larger ones for more like 26 minutes.

Optional crumb topping (that I'm usually too lazy to bother with - the muffins are good enough):

  • 1/2 cup sugar
  • 5 tablespoons flour
  • 1/2 teaspoon nutmeg
  • 4 tablespoons cold unsalted butter, cut into pieces or grated